RVM and Ruby installation
ruby, rvm, installationBasic installation
As stated on the RVM website. You can find the following instructions here:
# install prerequisites
sudo apt install software-properties-common
# add the PPA
sudo apt-add-repository -y ppa:rael-gc/rvm
sudo apt install rvm
Note: you don’t need to update the package list because adding a PPA does it automatically in Ubuntu 18.04.
The webpage says that you should add all the user that are going to use RVM to the rvm group. Normally, sudo apt install rvm did it for your current user. You can check it by typing groups $USER. If you want to add another user, you can do it with this command: sudo usermod -a -G rvm <username>
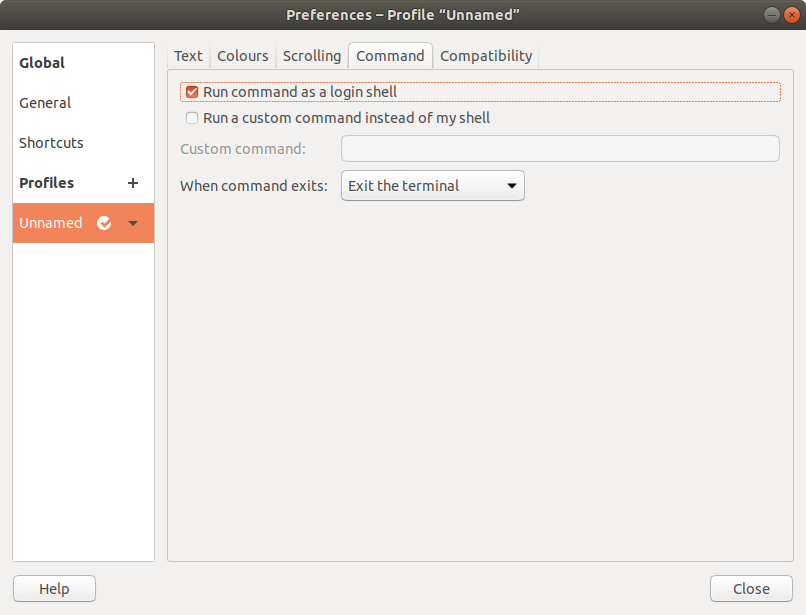
The website says as well to change the configuration of your terminal by “Running command as a login shell”. This is under “Edit - Preferences - Command”:
Then you need to log off and log in again in order to make some changes of your environment effective. You can restart as well instead of log off and log in.
Post installation instructions
I highly recommend, once the installation are done, to install the latest stable ruby using rvm. To do so: ruby install 2.5.1, you can check the version number here.
Bug:
If by mistake, you installed another version and you don’t figure out how to make your desired ruby version the default (in my case, ruby --default use 2.5.1 didn’t work), you can put this line at the end of ~/.profile: source $(rvm 1.9.3 do rvm env --path). I had to add rvm_silence_path_mismatch_check_flag=1 to my ~/.rvmrc as well to get rid of a warning.
Note: If you see what I have done wrong, you can drop me a comment and I will update the article :)
Manage your ruby versions
To install a ruby version: ruby install 2.5.1
To make it default: ruby --default use 2.5.1